Tag Archives: cake

Pineapple Upside Down Cake

12 Jun

Pineapple upside down cake.

Whenever I see those words, I swear my mouth starts watering within milliseconds. And this recipe? It’s absolutely divine. Hands down. It’s simply and undoubtedly amazing. I know I say that about a bunch of stuff, but this is seriously one of my favorite cakes EVER. And I’m sharing it with you.

I mean, how can you not drool just looking at that?!

Sorry. I get carried away sometimes.

Topping:

  • 1 cup firmly packed brown sugar
  • 1/2 cup unsalted butter
  • 1 (20 oz) can pineapple slices

Cake

  • 1 1/2 cups all-purpose flour
  • 6 Tbs cake flour (or just a little extra APF)
  • 6 Tbs ground almonds
  • 3/4 tsp baking powder
  • 1/2 tsp salt
  • 1 3/4 cup sugar
  • 1 cup unsalted butter, room temperature
  • 4 large eggs
  • 3/4 tsp vanilla extract
  • 3/4 cup sour cream

Surprisingly, this recipe is fairly simple.

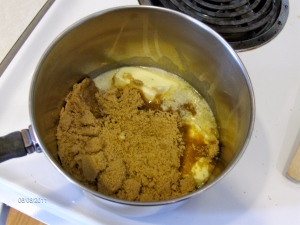
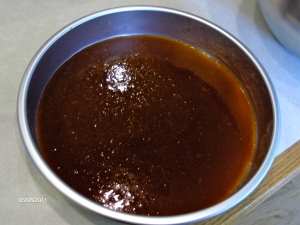
To start off with, preheat your oven to 325 degrees. Then, put your brown sugar and butter in a saucepan, and let it all melt down over medium heat into gooey goodness (try saying that five times fast). Stir as little as possible. This process should take several minutes. Once everything is melted and bubbling merrily away, pour into a 10-inch cake pan*.

Don’t be tempted to eat this, no matter how delicious it smells. This is extremely hot and will burn you. I know from experience. Sigh.

Arrange your pineapple slices over the sugar mixture.

Combine your flour, almonds, baking powder, and salt in a medium mixing bowl.

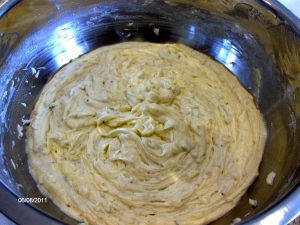
In a separate bowl, beat your sugar and room temperature butter together until light and fluffy.

And here’s a hint for getting butter to room temperature really quickly: cut a stick of butter in half, and microwave it on a plate for 15-20 seconds. Works like a charm.

Add the eggs, one at a time, beating well after each addition.

Beat in the vanilla.

Add your dry ingredients alternately with the sour cream until all is incorporated .

Pour cake batter over pineapple slices.

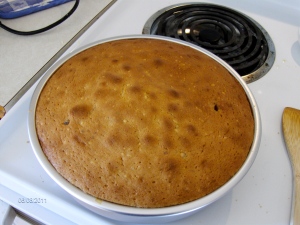
Bake for 60-75 minutes, or until a toothpick inserted in the center comes out clean. It will be golden brown and delicous.

Let it cool for about 10 minutes so it has time to settle. Then, invert onto a serving platter or cake stand.

Serve while still warm.

AWESOMENESS. The end.

*When I first made this, I used 9 inch pans and it somehow magically fit. I still don’t believe they were 9 inch pans, because when I made this the second time, I also used 9 inch pans, and I had WAY too much batter to fit in the pan. If you use 9 inch pans, just pour the remaining batter into another cake pan (there should be enough so that the batter is about an inch deep) and bake it until it’s done. You’ll have a lovely cake/bread/scone thing to eat for breakfast.

*I’ve also made this successfully in a cheesecake springform pan, if you happen to have one around and don’t have 10 inch pans.

Tres Leches Cake Adventures

7 Jun

My sister Sarah sent me an email yesterday with a link to a recipe of a cake that I am extremely fond of: tres leches cake. It’s amazing. And, since I was having issues deciding what I wanted to make for dinner, I decided “what the heck, let’s do Mexican!”. We made fajitas and tres leches cake. Yuuuum! I’ll post the fajita recipe at some later date. The cake recipe had a really pretty picture on the front, and since I was feeling adventurous, I dove right in.

For the cake:

  • 2 cups (8 oz.) blanched almonds
  • ¾ cup plus 2 tablespoons sugar, divided
  • ¼ tsp. ground cinnamon
  • 7 large eggs, separated
  • 2 tbsp. all-purpose flour
  • ¼ tsp. baking powder

For the soaking liquid:

  • ¼ cup heavy whipping cream
  • 2 tbsp. dulce de leche
  • ¼ cup cream of coconut
  • ¼ cup sweetened condensed milk
  • ¼ cup evaporated milk
  • 1½ tsp. vanilla extract

For the sugared almonds:

  • 2 large egg whites
  • 2 cups slivered almonds
  • ½ cup sugar

For the frosting:

  • 2 cups heavy whipping cream
  • ¾ cup confectioners’ sugar, plus more for dusting
  • Splash of vanilla extract
  • Fresh berries, for garnish (optional)

I’m not going to lie, this is not a recipe for A) those with not a lot of time or B) the faint of heart. But, if you aren’t one of those things, go right ahead. It doesn’t hurt.

First, line the bottom of your 9×13″ pan with parchment paper (or foil, I suppose), and spray and/or flour the sides of the pan. This is important! I didn’t line the bottom of my pan with paper, and I had one heck of a time getting it out.

Then, get your almonds, 1/4 cup sugar, and cinnamon and blend them together in a food processor. I probably only used one cup of almonds… no big. Right?

And for the record, I love my Ninja food processor. It is pretty much my favorite kitchen appliance ever.
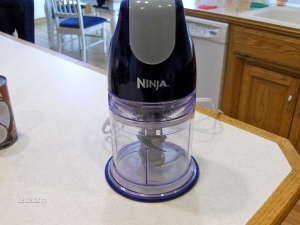
It's a Ninja. It's awesome.

Take a big mixing bowl, and whip your egg whites until they’re fluffy and make stiff peaks. Funny story… I don’t read recipes; almost ever. I think I’ve mentioned that a few times. So I just separated two eggs and disposed of the yolks. That wasn’t smart. SAVE YOUR YOLKS! Anyway, I whipped the two egg whites until they were stiff and making peaks, like the recipe said. When I went to look at how much flour to add, I noticed something funny… the recipe said 7 eggs, not 2. Wow, I’m smart.

Anyway, the moral of the story is to use seven (7) eggs. And don’t throw away the yolks.

Transfer them to a separate bowl (what?!) and set aside.
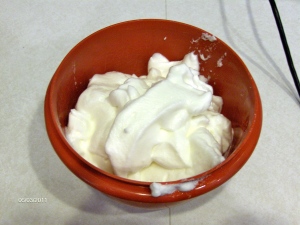
Wipe out your mixing bowl, and to the now-clean bowl add your egg yolks and remaining sugar (1/2 cup plus 2 Tbs), and beat on medium high speed for 3-4 minutes, until light and fluffy. Fold in the baking powder and flour gently with a spatula, and then fold in your almond mixture.
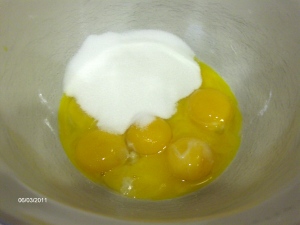
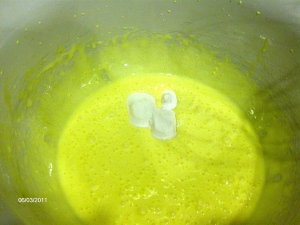
(The alt text is supposed to say baking powder, not baking soda. My bad.)

And then you “mix in a third of the beaten egg whites to lighten the batter.  Fold in the remainder of the egg whites until evenly incorporated and no streaks remain”. I think about halfway through reading that I said “screw it” and added all the egg whites at once, folding somewhat gently.

And then I kind of mixed the entire thing together with my mixer… that probably wasn’t the smartest thing to do. Don’t be like me.

Then, pour it gently into your prepared pan and bake for 26 minutes at 350 degrees until a toothpick inserted into the center comes out clean. 26 minutes was perfect for me, for you it may be different. Just make sure you don’t over-bake it.

While it’s baking, make your soaking liquid and whipped topping, and prepare your sugared almonds.

For the soaking liquid, literally just throw your milks into a bowl and sir. Well, add them to a bowl. Throwing them in might get a bit messy.

And you know what? I didn’t have any dulce de leche on hand, and I was kind of in a rush, so I didn’t add it. And I didn’t add cream of coconut.. I just added some coconut milk. Did it taste fine? No. Did it taste great? Yes.

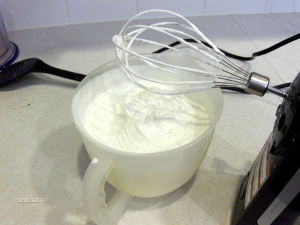
For your whipped topping, pour your heavy whipping cream into a bowl and whip on medium-high speed until soft peaks form (What is it about this recipe and peaks?!). Then add your confectioner’s sugar and vanilla, whipping to combine.
Your cake should probably be done by now, so let it cool for five minutes, and then invert it onto some parchment paper on a wire cooling rack.

Remember how I said I didn’t line the bottom with parchment paper? Yeah, that is a HUGE mistake. Even gravity didn’t get that sucker out of the pan.
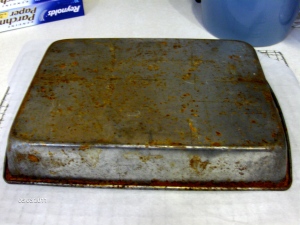
Don’t be like me. Anyway, while your cake cools, prepare your sugared almonds. Honestly, I think the almonds are this recipe’s saving grace, and I don’t even like nuts. I know, right? Anyway, these are pretty freaking good.

Take your egg whites and whip them until frothy; not necessarily until soft peaks form. Stir in your almonds and sugar until evenly incorporated.

Line a baking sheet (or cookie sheet, or whatever floats your boat that day) with parchment paper or foil (I learned my lesson this time!), and spread your almond mixture around in an even layer.
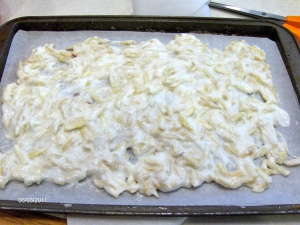
Then lower the temp on your oven temperature to 325 and bake your almonds for about 20 minutes, until they’re golden brown and slightly crispy.
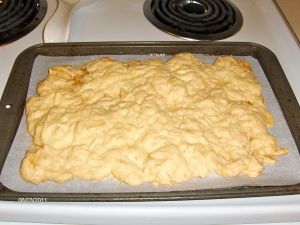
This is how they should look when they come out of the oven (pardon the bad lighting… I’m not a photographer).

And then you’ll want to break them up slightly (I used a meat tenderizer covered in plastic so the almonds wouldn’t get in the grooves) after they’ve had a chance to cool for five minutes or so. Once you’ve beaten them, transfer them into a bowl and break them up into fine pieces with your hands. Make sure to wash your hands first.

Don’t be ashamed if you sneak a few pieces. They’re really tasty.

Then comes the time to (finally!) assemble the cake. Honestly, I found this part to be kind of tedious and time-consuming, so I probably didn’t allow enough time for the soaking liquid to soak, but it still tasted pretty good.

Using a “serrated knife” (a normal knife would work just as well, IMHO), cut your cake into thirds width-wise, like so:
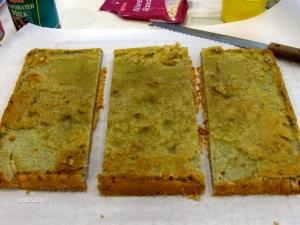
For the record, I have no idea why it looks green. I really don’t. Yours shouldn’t look green if you lined your bottom with parchment paper.

Put one of your thirds on a serving platter, and brush with as much soaking liquid as you can get it to absorb. The more, the better.

Pardon the blurriness.

And then put some of your whipped topping on top, and then put another layer, brush more soaking liquid, put more whipped topping, put the last layer on, and then cover the entire thing in whipped topping.

At least, try to make it look somewhat pretty. I just kind of slathered the stuff on. Don’t be like me.

And then cover it with your sugared almonds, topping with your berries (I used raspberries) for garnish.
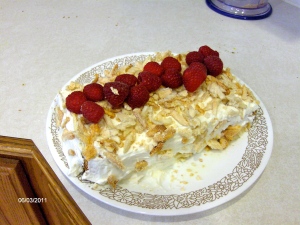
I kind of flung the almonds at the sides to make them stick… it didn’t work too well but I’m too impatient for cake to make it work. You’ll probably have better luck. Cut into slices and serve:
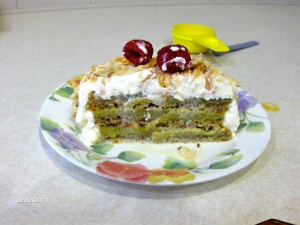
Try to ignore the measuring cups in the background. I just wanted cake.

My dad said he would give this cake a 9.5, but I’d say around a 7. It’s definitely not as good as another tres leches cake I’ve made in the past (which I will post… eventually), but it’s pretty good in and of itself. Store covered in the fridge. Enjoy!

Rainbow Cake

31 May

A few days ago, I gave my sister Missy a piece of my rainbow cake (the one I made before making BLT’s, if you remember me mentioning it) and she fell in love with it. So, she asked me if I would help her make it for her co-worker, who was just coming back from maternity leave. I said sure, because I love her to death (Missy, anyway) and the fact that rainbow cake is so freaking cool. Anyway, here’s what we did.

  • 1 box Betty Crocker white cake mix
  •      2 egg whites
  •      1 1/4 cup water
  •      1/3 cup veggie oil
  • Red, yellow, green, and blue food coloring
  • cooking spray

It’s a short list, but it makes for one really good cake. For the eggs, water, and oil, just follow the recipe on the back of your box. I can’t remember exactly the measurements… just follow what the box says. Anyway, mix it all together…
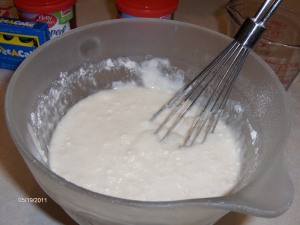
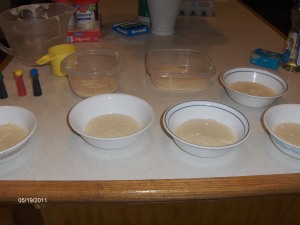
Mix it all together

…and it doesn’t matter if it’s completely mixed. You’ll be stirring more later.

Then, separate it equally into six bowls (I was a noob and got seven but whatever. Don’t be like me. Use six.).

Separate into SIX bowls

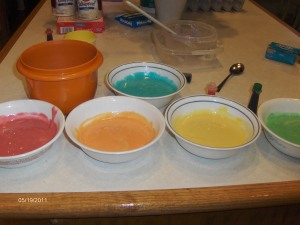
And get ready to dye!

Red: 5 drops red, 1 drop blue

Orange: 5 drops yellow, 2 drops red

Yellow: 6 drops yellow

Green: 5 drops green

Blue: 5 drops blue

Purple: 5 drops red, 3 drops blue

These colors are just approximate; feel free to use whatever combination to get your colors right. The drop of blue in the red helps it to not look so pink.

Pretty Colors!

(The purple is in the orange bowl… I didn’t have enough white ones. Boo.)

And then comes the (sort of) tedious part- baking. Take whatever color you want on the top, and bake it first. I ended up flipping the entire stack of cakes so that my first one turned out on the bottom, but that’s a little difficult. Anyway, bake in the order of the rainbow. Pour the batter into a well-greased 9″ cake pan (This is important! Don’t forget to grease the pan!), making sure to get all the batter out of the bowl that you can.

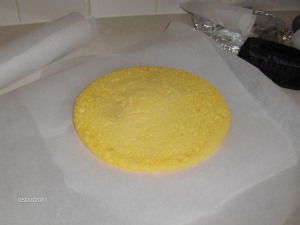
Spread it around, making sure that the batter is of even depth all the way around the pan. You want your cakes to be flat. I know it doesn’t look like a lot of batter, and you would be right. It isn’t. Just go with it. Anyway, spread it around.

Pardon the blurriness.

And then stick it in a 350 degree oven for 7 minutes, or until a toothpick inserted in the center comes out clean. I found that 7 minutes was perfect, but you may find that a different time works for your oven. I would put it in for 5 minutes, check it, and then add time accordingly your first time making this. When it comes out of the oven, let it cool in the pan while the next one bakes.

When the next one comes out of the oven, VERY gently flip the pan upside down onto parchment paper until the cake slides out. This is why greasing is important. If you don’t grease the pan, you’ll have to assemble your layer like a puzzle piece. It’s sorta annoying. Anyway, set it on a cooling rack, on top of the parchment paper, setting layers on top of the last (with parchment paper in between each of them!!).

And continue this process for all of your layers, rinsing out the cake pans in between colors (unless you happen to have 6 cake pans, which I don’t). Then let them cool for 10 minutes before attempting to frost. Longer would be ideal, but seriously I don’t have that kind of patience. 10 minutes sufficed.

Take your bottom later (mine was red), and set it on a plate or cake stand. Then, frost with a thin layer of icing. Don’t be tempted to  A) eat the icing out of the can or B) layer the icing too thickly between layers. You won’t have enough later if you do.

See how you almost can’t see (hehe I made a funny) the icing between the red and orange layer? That’s good. And keep doing that for all your layers.

When you come to the purple layer (or the red, depending on what order you do it in), put a huge glop of icing on top. Now is your chance to go crazy with the icing. I, of course, forgot to take pictures of the last few steps, but I’m sure you know how to spread icing around. The goal is to cover every single bit of color with the white frosting so that it’s a surprise when it’s cut into. So frost away! Have fun! Be free! And don’t be afraid of using too much icing. I don’t think it’s possible.

What’s the difference between frosting and icing, anyway? I use the two interchangeably, so deal with it.

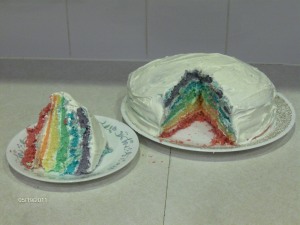
At the end, your cake should look like THIS!

Rainbow Cake

Yummy, yummy, delicious goodness. Great for birthdays, baby showers, graduations, anniversaries, what have you. Enjoy your rainbow cake.